Easy, Low-Cost Vents for Harley Fairing Lowers
So whaddaya need vents for anyway? Well, because it gets hot behind the lowers, especially in the summertime when you got all the heat you need anyway. As you ride, it creates a low-pressure area behind the lowers (call it "suction" if that's easier for you) and pulls heat from the engine right onto your lower legs. A set of vents will break that suction and let the heat flow back along the side of the bike to your passenger's legs. (You'll just have to make your own explanations to her about that; not my job.) The solution I suggest here is very effective; it breaks that suction and puts a nice draft along you legs. It is good enough that I leave the lowers on year-round, even on summer trips.
Low-cost does not mean "not very good." You can pay upwards of $200 plus installation for a set of Harley or aftermarket vents for your bagger, OR you can do what I did. The parts cost less than $30 and the time is just hour or so it takes to remove and replace the lowers. This solution is so good you gotta wonder why the factory spends more than it needs to on their arrangement.
Introduction and Special Tools
This job is quick, easy, and cheap - period. The hardest part is finding a proper-sized hole saw - either 3 1/4" or 3 3/16ths".) I know a friendly sheet metal shop that lent me one for nothing, but I have done business with them before. If you can't score one that way, then take the lowers to someplace that will cut the holes for you. That hole saw is the ONLY special tool you will need.
Here are the necessary steps.
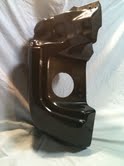
Inside view of right lower with hole cut.
|
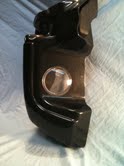
With vent installed and closed.
|
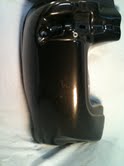
Front view, lower dismounted, vent closed.
|
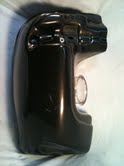
Front view, lower dismounted, vent open.
|
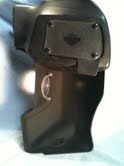
Rear view, lower dismounted, vent closed.
|
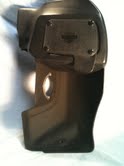
Rear view, lower dismounted, vent open.
|
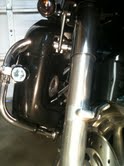
Front view, lower mounted, vent closed.
|
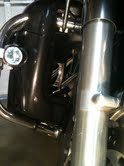
Front view, lower mounted, vent open.
|
The shots of the lowers mounted do not really reflect how nearly invisible they are. Someone doing a normal walk-around probably won't notice them. From front or rear, you have to bend over to see them clearly. Also, while they are clear plastic when you get them they can be painted to match.
Now, you may wonder how weatherproof this installation is. The answer is, "Plenty!" The vent snaps open and closed pretty tight, enough that even in heavy rain I haven't had enough leakage to matter, no water blowing around, barely a dribble down the inside, at worst. But it you are real fussy, all you have to do is rotate it so the opening points down or back before you close it and it is weatherproof.
It is possible to open and close the vents when you are under way; it just takes a little finger pressure to make it happen. Understand, though, that I don't recommend this, for such gyrations on a moving bike are an invitation to disaster, or so the lawyers say. So my advice to you is to come to a full stop, put down the sidestand, get off, and make any adjustments needed. Yeah. Then ride safe!
Now, the obvious remaining questions is this: Where do you get the vents? That is a sneak ploy on my part to get you to email me and ask. I don't sell 'em and I damn sure don't sell your email address to anyone. I just like to know who reads this stuff.
Pilgrim Wildwestcycle.com March 31, 2011